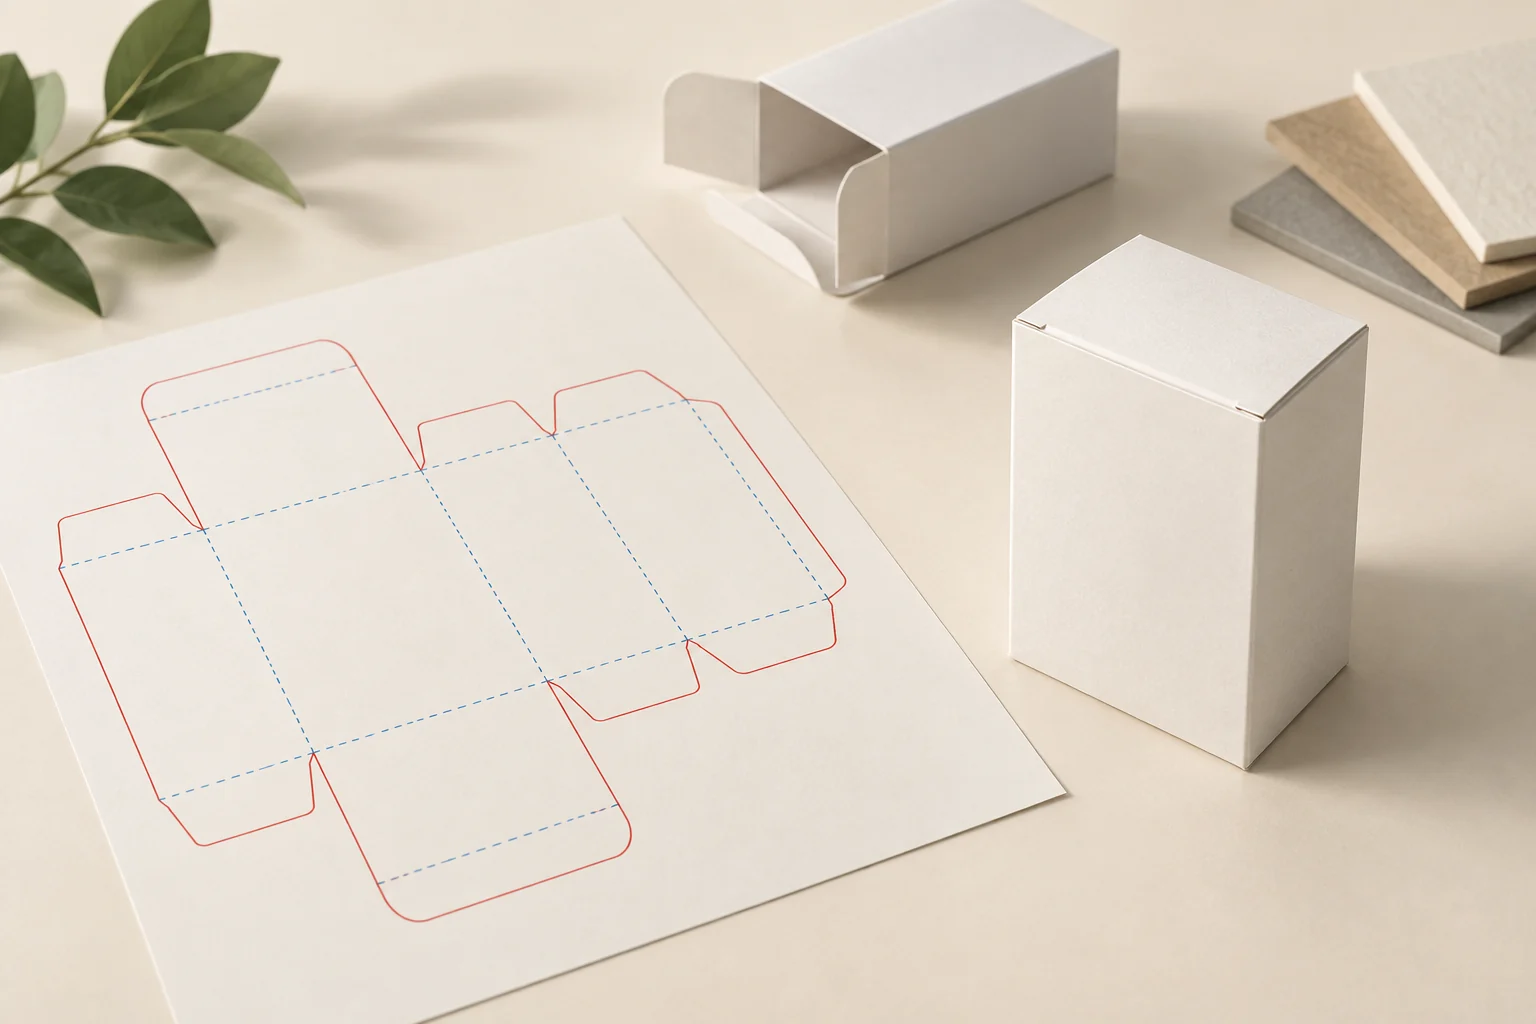
A packaging dieline is a flat technical drawing that defines a package’s cuts, folds, panels, and assembly features. Designers position artwork on it; manufacturers use its approved geometry to prepare production. Before ordering custom boxes, buyers should confirm the drawing’s dimensions, material, revision, and sample results rather than approving the appearance alone.
Key Takeaways
- Obtain the production dieline from the selected packaging supplier.
- Confirm whether dimensions refer to the inside or outside of the assembled box.
- Follow the file’s legend; line colors are not universal.
- Use the supplier’s specified bleed and safe areas.
- Approve product fit separately from artwork and color.
- Keep the approved drawing, artwork, sample, and order specification connected by revision numbers.
Table of Contents
- What a dieline controls
- How to read the drawing
- Materials and box structures
- From product measurements to production
- Printing and finishing checks
- Cost factors and supplier questions
- Approval decision table
- Quality control and packing
- Frequently asked questions
- Prepare your quote request
What a Dieline Controls
A dieline connects the flat production layout with the assembled package. It can identify panel boundaries, closures, glue flaps, windows, and other structural features. Bleed and safe-area guides help designers place printed content around that geometry. See PearlFold’s dieline guidance.
Dieline versus artwork: the dieline defines the package structure; artwork defines the graphics placed on that structure. Changing a logo does not necessarily change the structure. Moving a fold or changing a closure requires structural review.
Dieline versus cutting die: the drawing is a file. A cutting die is physical production tooling used in an applicable converting process. Ask whether the quotation includes new tooling, existing tooling, or a different cutting method.
A good purchasing specification connects the file to the product, material, printing method, and approval records. An attractive rendering alone does not establish production readiness. HS PACKFACTORY’s preflight guide makes this distinction explicit.
How to Read the Drawing
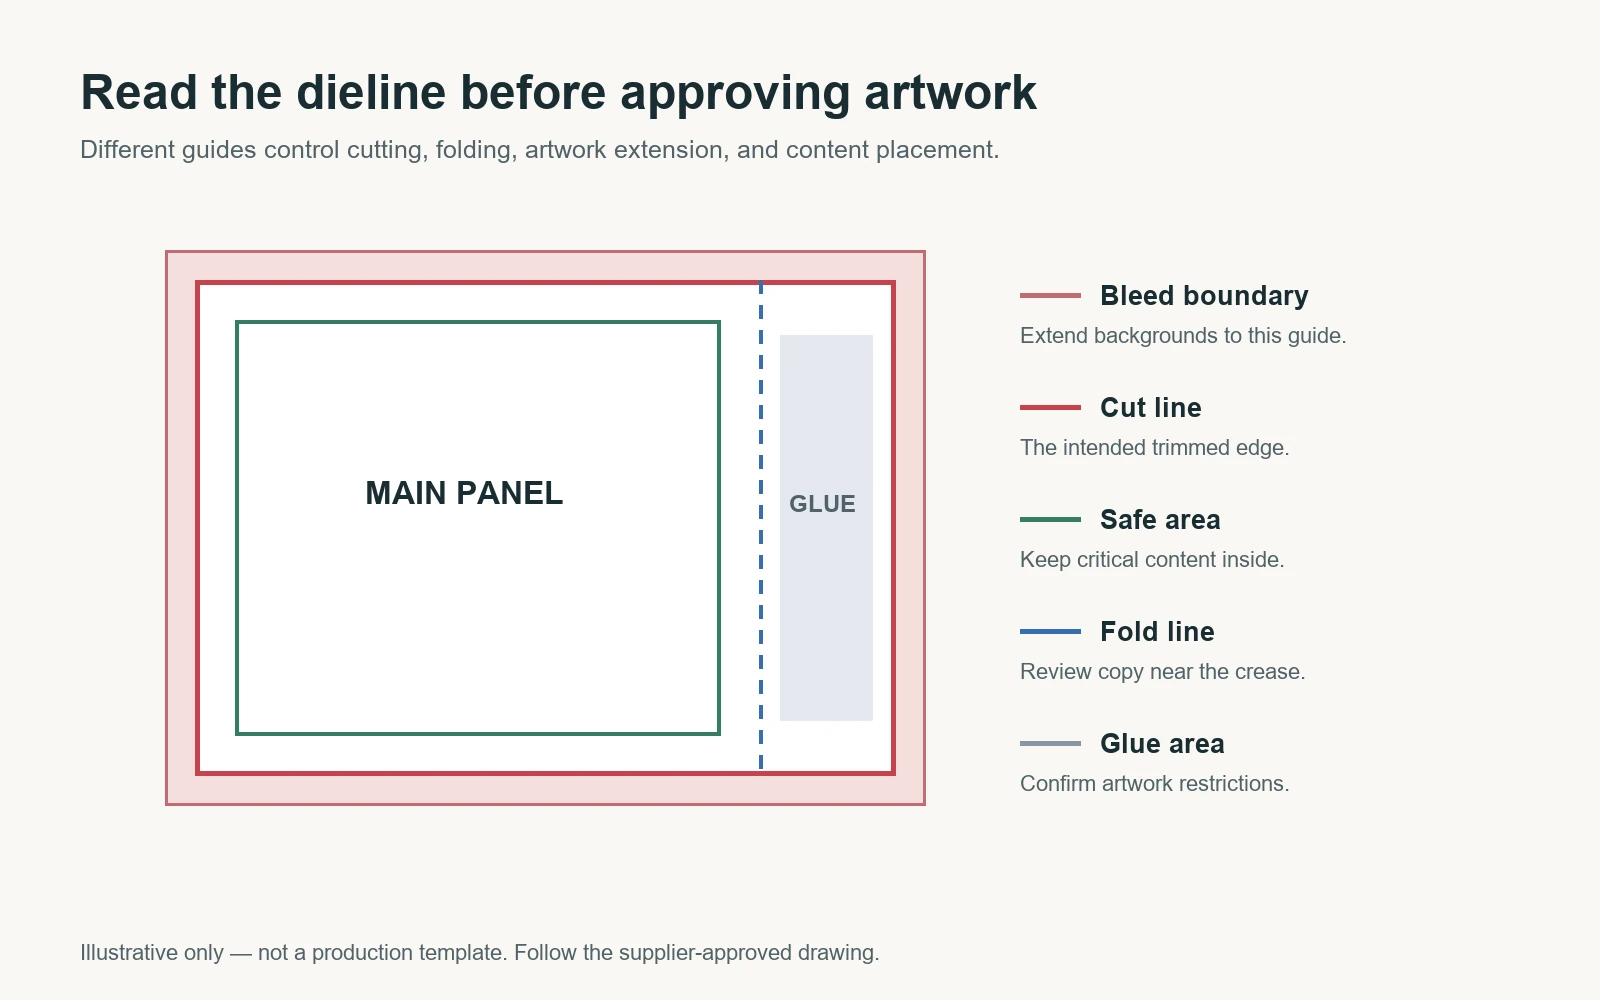
Check the drawing legend before interpreting colors or dashed lines. Suppliers can use different conventions.
| Feature | What it communicates | Buyer’s check |
|---|---|---|
| Cut line | Where material will be cut | Product clearance, openings, and exposed edges |
| Crease or score line | Intended fold position | Panel orientation and content near folds |
| Glue area | Adhesive or assembly zone | Restricted artwork and coating requirements |
| Perforation | Controlled tear feature | Opening function and surrounding graphics |
| Bleed guide | Background extension beyond trimming | Artwork reaches the required boundary |
| Safe area | Placement boundary for critical content | Logos, text, and codes remain protected |
Bleed versus safe area: bleed extends backgrounds beyond the intended cut edge. A safe area keeps important content away from cuts and other structural features. They solve different layout problems. Printy Packaging’s artwork guide explains both.
Do not impose one bleed value on every packaging format. Use the value issued for the selected structure and process. Structural approval and artwork approval establish different evidence. P&M’s approval guidance.
Materials and Box Structures
Choose the structure before finalizing the graphics. For a general comparison, see Types and Qualities of Custom Boxes.
- Folding cartons: confirm the selected paperboard grade and caliper, closure style, fold behavior, and assembly method.
- Corrugated boxes: specify the board construction and flute, then ask the supplier to account for the selected board in the structural drawing.
- Rigid boxes: clarify whether drawings cover the greyboard components, printed wrapping paper, lid, base, and insert separately.
Kraft paper, corrugated board, greyboard, and coated art paper describe different materials or components. “Cardboard box” is not a complete specification. Ask which material performs the structural role and which carries the printed surface.
A rigid box may need several coordinated drawings rather than one carton-style layout. Compare the required presentation with Packaza’s rigid-box guide and custom rigid boxes.
Buyer’s decision: approve the material and structure together. A drawing accepted for one board specification should be reviewed before a material substitution.
From Product Measurements to Production
1. Describe the packed product
Provide product dimensions, weight, orientation, accessories, and any insert requirements. Include protruding parts and the intended packing method. State whether you want internal usable dimensions or external finished dimensions.
2. Request a project-specific drawing
Confirm units, scale, revision, panel names, and the printing side. Ask who is responsible for structural engineering and approval. A downloaded template can support an early concept, but the selected supplier should approve the production geometry.
3. Review the structure physically
Use a structural sample to check fit, closure, removal, and packing. A paper dummy can reveal panel orientation; it cannot reproduce every property of production board, adhesive, or finishing.
4. Place artwork on the released drawing
Keep structural information separate from printable graphics. Package linked assets and fonts as requested, and provide a reference PDF. Packhelp demonstrates a supplier-specific Illustrator workflow in its dieline design tutorial.
5. Approve the right evidence
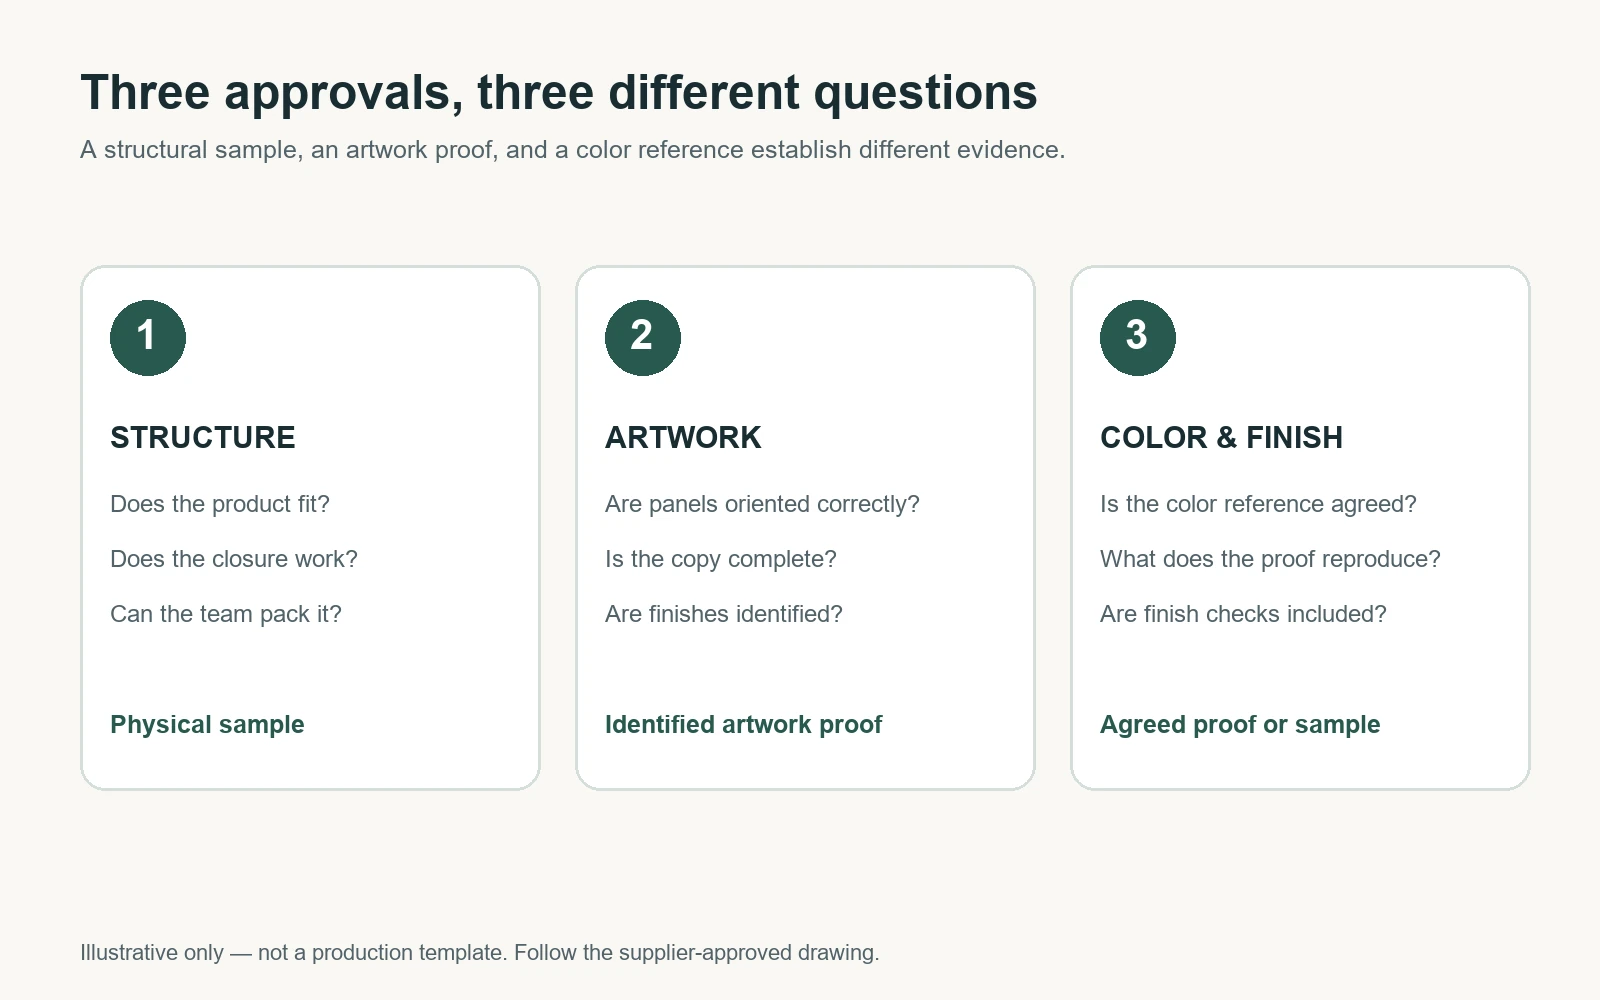
Review the structure, artwork, color reference, finishes, and order specification according to the agreed sampling route. A digital proof and a physical sample answer different questions.
6. Release one identified revision
Record the approved dieline and artwork filenames, sample identification, approval date, and any exceptions. After a structural change, review the artwork again before release.
Common mistake: resizing the whole drawing to fit a larger product. This also changes closures and assembly geometry. Request an engineered revision and confirm any tooling consequences.
Printing and Finishing Checks
For offset or other selected printing processes, confirm the supplier’s color setup, image requirements, font handling, and export settings. CMYK and agreed spot colors serve different purposes; screen appearance is not a physical color approval.
Separate foil stamping, embossing, debossing, and spot UV instructions into named production layers or separations. Check how they relate to folds, edges, and assembly zones. Might Print’s artwork preparation guide covers editable assets and special finish identification.
Confirm which technical layers remain in the review file and how they are excluded from the printed graphics. A dieline accidentally appearing on a finished box is an artwork-output problem, even if the structure is correct.
For barcodes and QR codes, review placement, size, contrast, and clear surrounding space at actual scale. Agree on the required verification method; a casual phone scan is not a complete quality specification. PearlFold’s artwork checklist includes machine-readable content and panel review.
Cost Factors and Supplier Questions
There is no reliable universal price for a custom dieline or the packaging made from it. Request an itemized quotation for your project.
| Cost driver | Question to ask |
|---|---|
| Structural development | Are engineering and revisions included? |
| Tooling | Is new tooling required, and who owns it? |
| Sampling | What material and printing process will the sample use? |
| Printing and finishes | Which setup charges are separate? |
| Inserts and assembly | Are these included in the unit price? |
| Packing and transport | What carton dimensions and packing quantity are assumed? |
Compare suppliers on the same material, size, quantity, printing, finish, sample scope, and delivery basis. Ask how revisions are controlled and what happens if the supplied artwork fails preflight.
Before comparing quotes: separate one-time development charges from repeat-order costs. Before reordering, confirm the supplier still has the approved files and usable tooling.
Approval Decision Table
| Situation | Evidence needed | Decision |
|---|---|---|
| Product or insert changed | Revised fit review and structural sample where needed | Hold approval until fit is confirmed |
| Artwork changed on unchanged structure | Updated artwork proof and affected color/finish checks | Approve the identified artwork revision |
| Material changed | Structural and process review | Reassess before reusing the drawing |
| Important code sits near a fold | Revised placement and agreed code checks | Resolve before release |
| Supplier changed | New supplier’s structural and prepress review | Do not assume automatic compatibility |
Quality Control and Packing
A useful QC plan checks the assembled package as well as the flat sheet. Agree on dimensional references and tolerances, then examine fit, closure, folding, adhesion, artwork position, and finish quality against the approved specification.
Practical QC check: place the actual product and accessories in the sample. A box can look correct while making packing difficult or holding the product in the wrong position.
Connect packaging approval with carton packing. Ask whether boxes ship flat or assembled, how surfaces are protected, and how many units fit in each master carton. For shipment planning, obtain external carton dimensions, gross weight, and quantity.
For a rectangular master carton measured in metres, geometric volume is length × width × height in CBM. Container loading also depends on arrangement, pallets, weight, and handling constraints; a volume calculation alone does not establish loading capacity.
Frequently Asked Questions
Who should provide the packaging dieline?
Prefer the selected supplier’s released drawing. If a designer supplies it, have the supplier review and accept the structural geometry before production.
Can I use a free template?
Use it for early layout exploration. Confirm the final dimensions, material, closure, and production allowances with the supplier.
Are dieline colors standardized?
Do not assume so. Follow the legend and named layers in the approved file.
How much bleed do I need?
Use the amount specified for your project. Request clarification if the drawing does not identify it.
Does a PDF prove that artwork is ready to print?
No. Readiness also depends on the correct revision, assets, colors, layers, finishing information, and supplier preflight.
Can I change the board without changing the dieline?
Ask for structural review first. Whether a revision is necessary depends on the new material and construction.
Does approving a white sample approve the printed colors?
No. A structural sample establishes different evidence from a printed proof or agreed color reference.
What should be retained for repeat orders?
Keep the approved specification, drawing, artwork, proof or sample references, and relevant tooling and packing information.
Prepare Your Quote Request
Before requesting custom packaging, prepare:
- Product dimensions, weight, orientation, and accessories
- Box style and insert requirements
- Quantity per SKU and delivery destination
- Preferred material and printing requirements
- Foil, embossing, spot UV, or other finishing requirements
- Existing dieline and artwork, with revision names
- Sample purpose, packing expectations, and target delivery date
Share these details with Packaza through the website’s quote form. Ask which drawing and sample approvals are needed for your project before committing to production.